Make Image Background Transparent With These 5 Photoshop Tools
Do you have a great image whose appearance you would wish to enhance? If you did answer yes, then you have to know the five Photoshop tools that can make image background transparent. These tools are generally very effective and ideal for professional use.
Whether you are a Commercial Photographer or an online retailer, shooting product photos and selling them online. Sometime you need to remove the background of your product photos or edit them to increase online sales or meet Amazon or Ebay guideline. To make image background transparent satisfactorily, you must of necessity use only the right tools. This is because the standards that are expected out of such exercises are way very impeccable. You therefore just cannot afford to gamble with this exercise.
Learn how to write perfect ebay product description following some easy steps
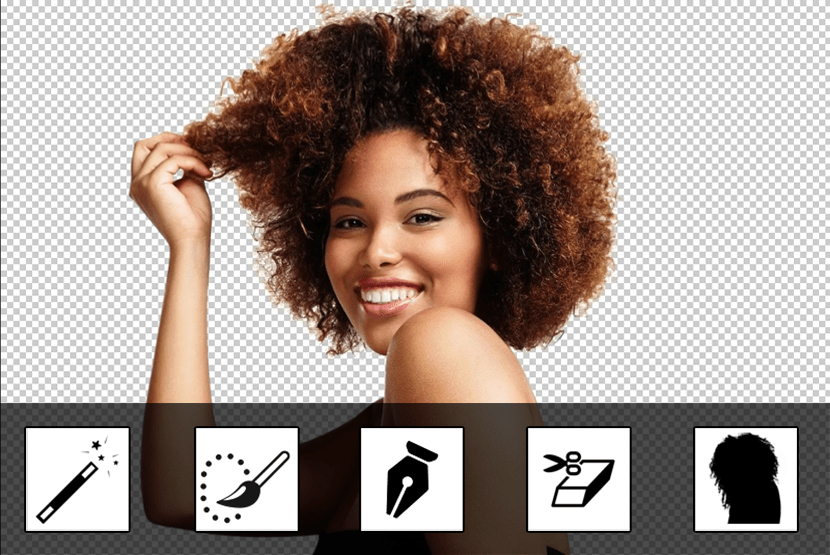
5 Photoshop Tools to Make Image Background Transparent:
- Magic Wand Tool
- Quick Selection Tool
- Pen Tool
- Background Eraser Tool
- Channel Mask
These tools form the basis of our subsequent discussions. We have already identified and are going to examine briefly the top five Photoshop tools which you may help you out.
1. Magic Wand Tool
The Magic Wand Tool, known simply as the Magic Wand, is one of the oldest selection tools in Photoshop. Unlike other selection tools that select pixels in an image based on shapes or by detecting object edges, the Magic Wand selects pixels based on tone and color.
To use this tool, to make image background transparent, follow these simple steps:
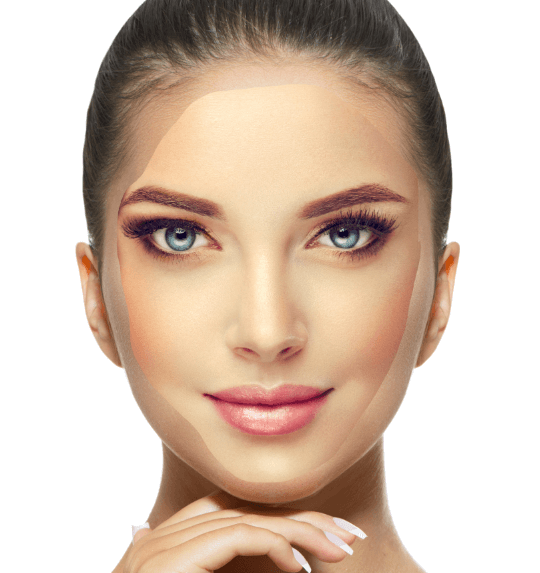
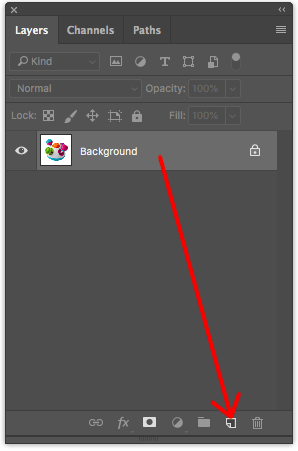
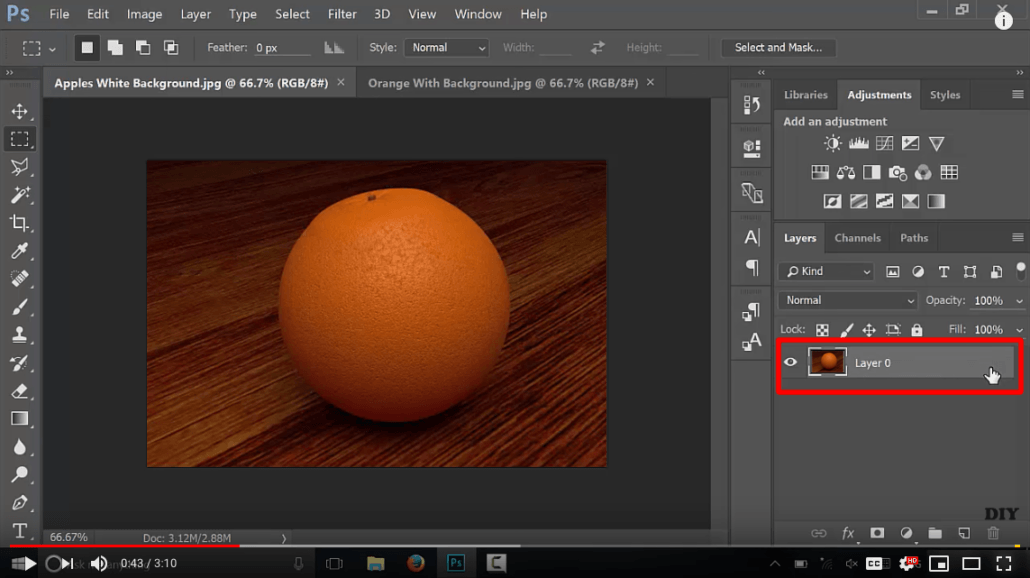
Step I: Open the Image and Make a Duplicate Layer
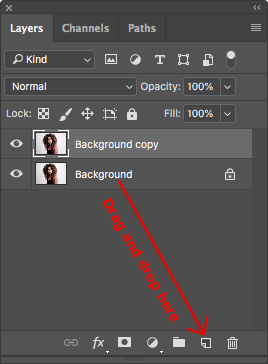
Start off by opening the image you are interested in handling. Proceed to save a copy of the image just in case it might get lost. Follow this by duplicating the image layer. This is to make it possible for you to fix any problem later.
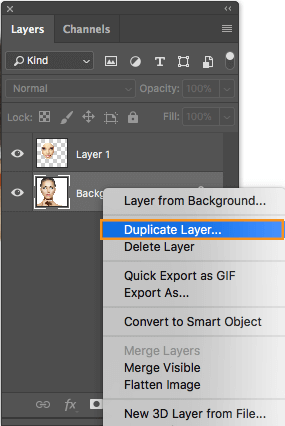
To do this, hold down the background layer and drag and drop it to the new layer option at the lower portion of the layer panel.
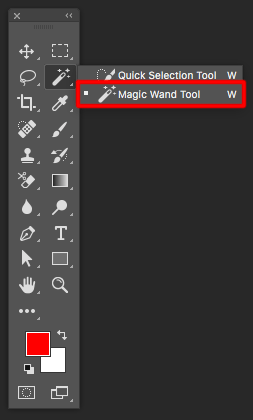
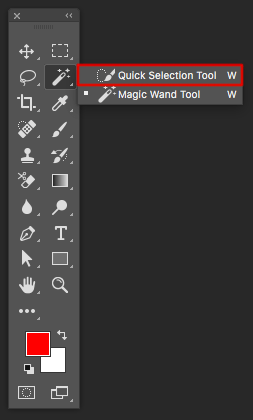
Step II: Select the Magic Wand Tool
Now select the magic wand tool. Go to the left panel in the Photoshop menu for the tool bar.
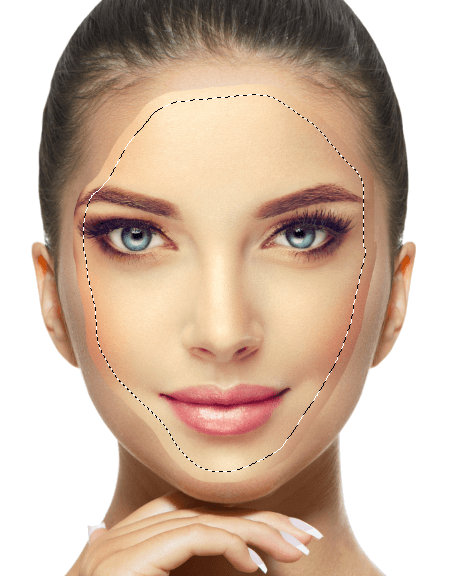
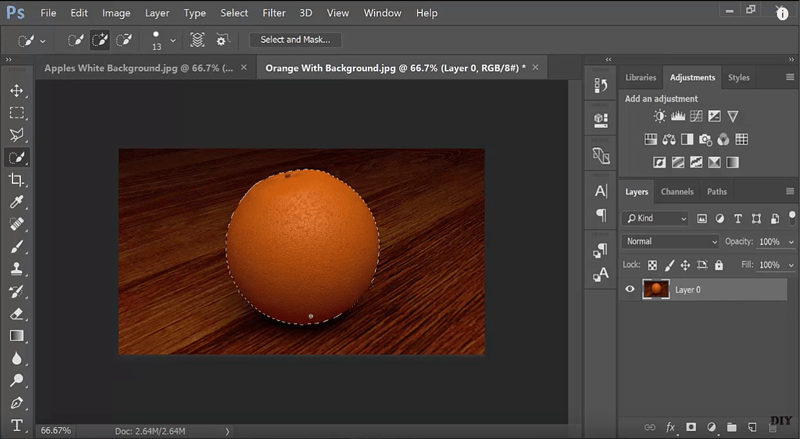
Step III: Select Background Area of the Image
You now have to select the portion of the image you intend to make transparent. To do this, grab the magic wand tool and click on any portion of the background area. This will automatically delineate the outlines or boundaries of the background you intend to make transparent. Once done, you will see some broken lines blinking around the outlines of the images.
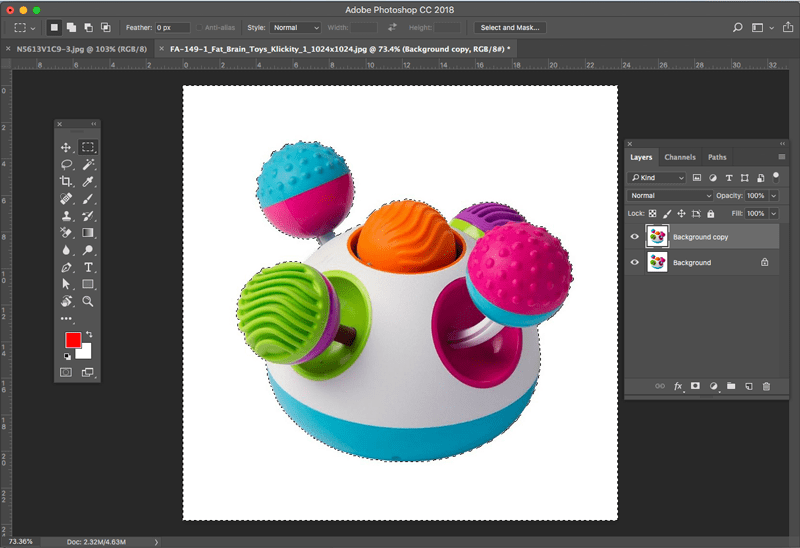
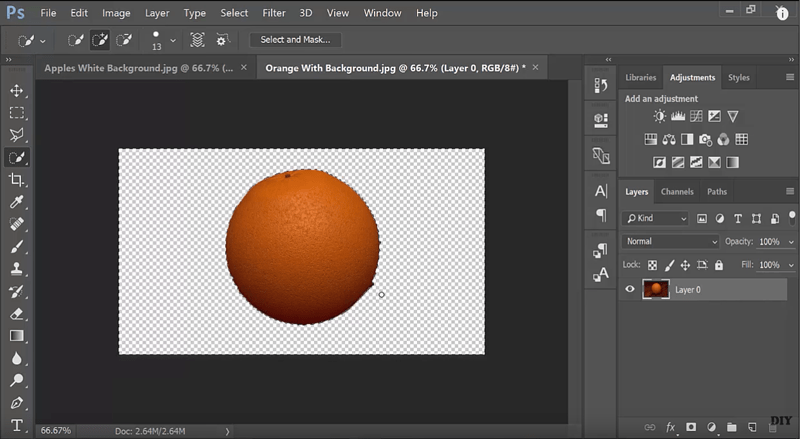
Step IV: Click ‘Delete’
After you are through with selecting the background, click the ‘delete’ button on your keyboard. The background you narrowed on should now be transparent.
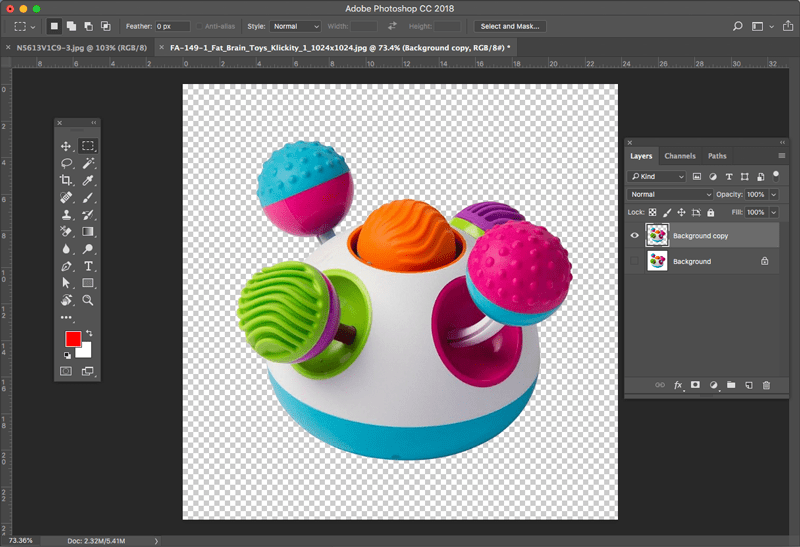
Please note that transparency in this sense does not infer the ability to see through. In fact, you will see a faint checkered pattern in the space between the image outline and the frame that encloses the image.
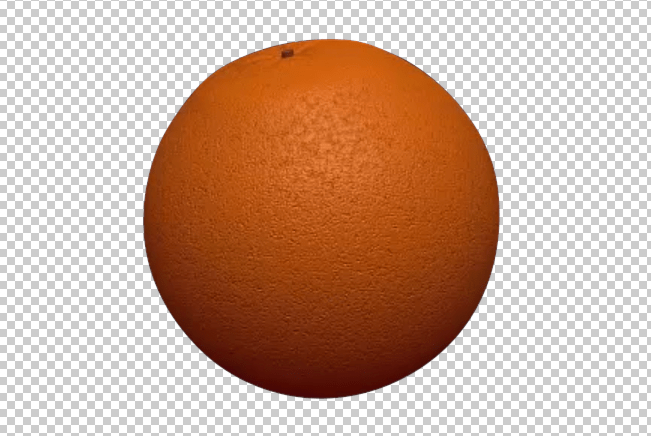
Step V: Make Final Touches
In case after the above step some portions of the image background remain non-transparent, follow the first three procedures ab second time. This should be able to fix the problem. You may also consider going manual or step by step as a final measure.
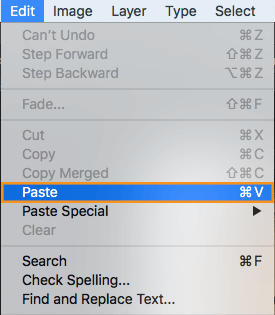
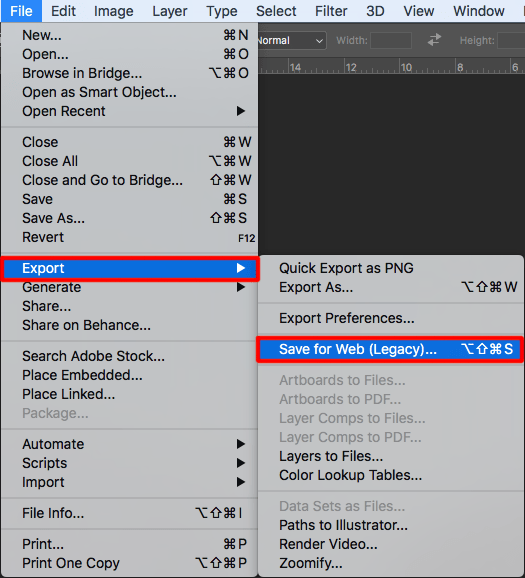
Step VI: Save the Image
Finish off by saving the image. To do so, click the ‘File’ main menu and then select ‘Save for Web (Legacy)’ from the File drop-down menu. Thereafter, select the image and then conclude the process by clicking ‘save.’
2. Quick Selection Tool
This tool is so called as it can allow you to quickly select the exact portion of an image you are interested in. It has a brush tip that is adjustable and round in shape. You engage this tool by dragging it. In the process, it expands outwardly. It is designed to find and follow the defined paths and edges automatically. To use it to make image background transparent, follow the procedures laid out below:
Step I: Unlock your Photo layer
Unlock the photo layer and generate a duplicate of the selected image. Simply click save as and then assign the duplicate a unique name. This will provide a back-up of the image and secure it against unnecessary loss.
Step II: Select the Portions of the Foreground Image you want to Retain
Now select the portions of the foreground image you intend to retain. This is where the quick selection tool comes in handy. Simply go to the ‘Tools Palette’ to activate this tool. Next, drag the tool around the boundary of the parts of the image you are interested in.
Step III: Inverse your Selection
Press Command + Shift + I or click Select then Inverse. This will enclose the image you are interested in and leave behind the background untouched.

Step IV: Effect the Change
Press ‘delete’ button from you keyboard to make the image background transparent.
Step V: Refine the Edges of the Foreground Objects
Proceed to refine the edges of the foreground objects. Use the eraser tool to do this. Select the eraser tool to use it on the area you wish to refine.

Step VI: Final Image
You may, if you so wish, enhance the edge more to make it high quality and final image will look like this.
3. Pen Tool
This tool resembles a pen. It is frequently used to create smooth edges of the selected images. It generates vector paths which convert into selections which may, in turn, be used to extract or mask out groups of pixels. It can also make image background transparent. To use it for this purpose, follow the steps laid out below:
Related content: Learn how much does clipping path cost to outsource.
Step I: Open the image in Photoshop
To do this, go to the menu and click ‘File.’ On the drop-down menu, click ‘open.’ You may also use the ‘Command + O’ on your keyboard to achieve this very end.

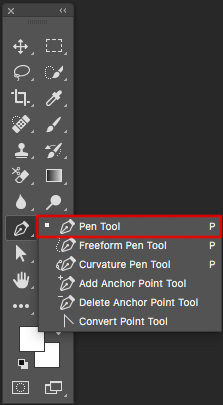
Step II: Select Pen Tool
Activate the pen tool. Go to the Toolbox and select the ‘Pen Tool’ option. You may also use the ‘P’ key from the keyboard as an alternative.
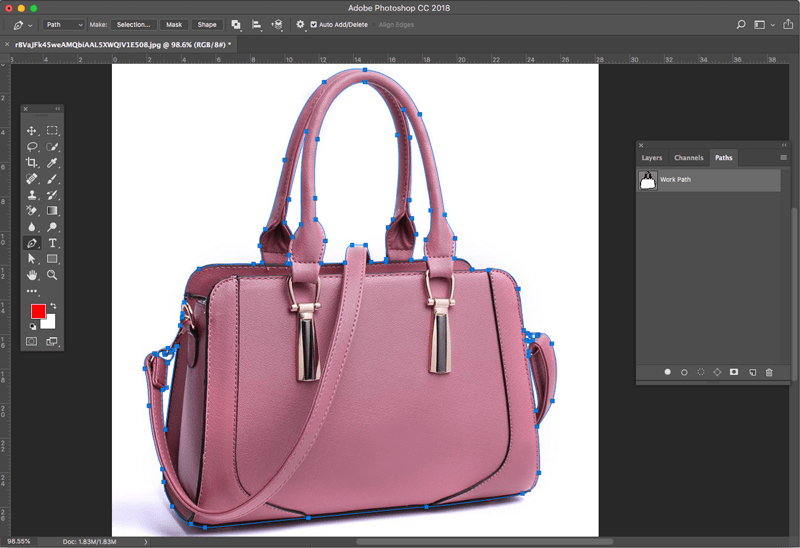
Step III: Draw the path
Next, draw the path of the enclosure around the object of interest. Press the mouse button on the edge of the specific object which you intend to cut within the image. Drag the mouse around the object and release it once you are through.
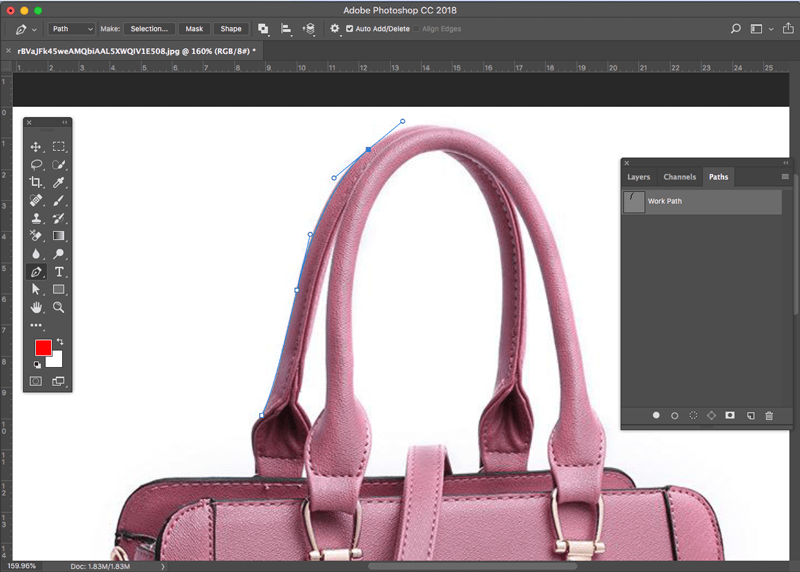
To make a curved path, ident the mouse. This is especially the case if you have round shapes to encircle. In case you want to make a corner, drag the mouse straight till you get to an end. Click the mouse and lift it off the point. Start drawing a new line by clicking the point from where you stopped. Drag the mouse again to another point. Apply this same technique to join two points together.
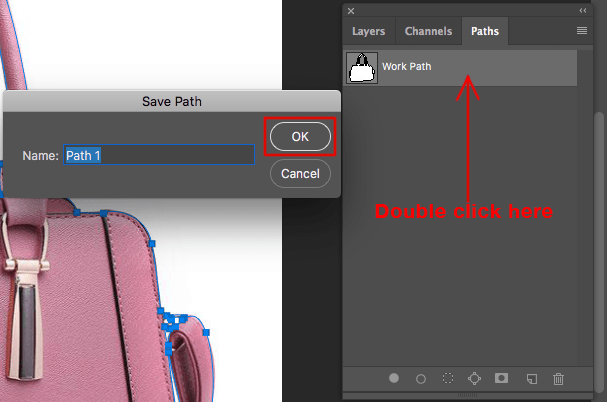
Step IV: Save the path
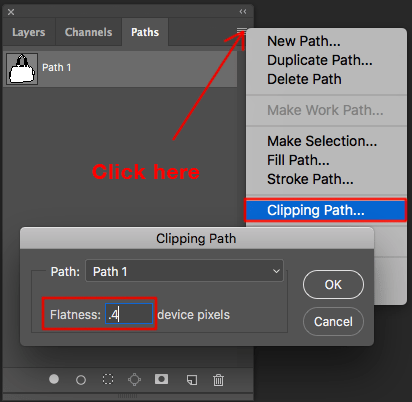
Save the final outcome. Go to the ‘Path’ palette and double click on the ‘path layer.’ Finish the procedure by clicking OK.
Step V: Delete the Background
Delete the background by applying a clipping path. To do this, click ‘clipping path’ on the ‘Path’ palette. Assign the desired flatness (from 0.5 to 1) on the device pixels. This should depend on the size of the image and ought to make the edge of the product photo as natural as can be.
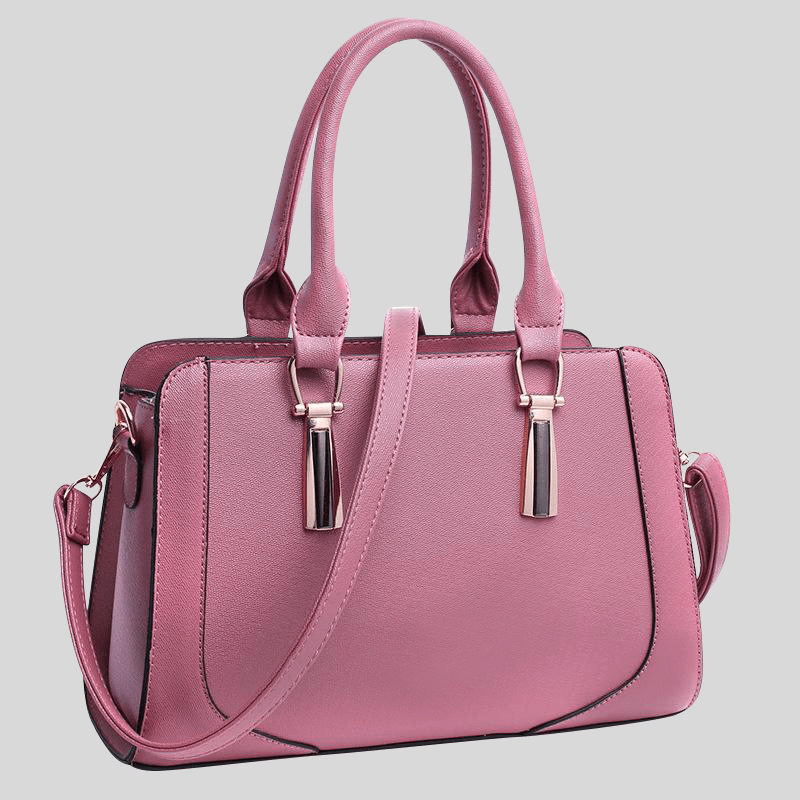
When you are done open the image in any other software like CorelDraw and the background is deleted. And then you can use any background color you like. For this image a grey color background has been used.
4. Background Eraser Tool
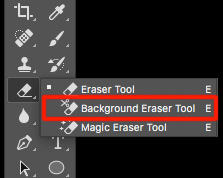
As the name suggests, this tool is used to remove background from image with hair or fur which is also called image masking technique. It is located under the regular Eraser Tool in the ‘Tools’ panel of the menu bar. Upon activating this tool, the cursor of your mouse shall change to a circle. It shall also have a small crosshair right at its center. Follow the steps below to use the tool to make image background transparent:
Step I: Open the Image
Open the image. Do this by grabbing the image you want to remove the background of.

Step II: Select Background Eraser
From the ‘Photoshop Toolbox’ select the ‘Background Eraser’. You may alternatively click and hold the Eraser tool to activate or reveal it.
Step III: Tune Your Tool Settings
Select a round hard brush from the tool options bar. Scale the size of your brush by using the square bracket key ([or]). This will facilitate the handling of your object appropriately.

Step IV: Erase the Image Background
Now commence erasing the background of the image. Do this by bringing the brush over the exact portions of the backgrounds you intend to erase. You will see a circle that is the size of a brush. This circle shall have crosshairs at the center.

Now set the background color using the eyedropper tool which you want to erase. Now click and move the eraser tool all over the background color and notice that the background color will be deleted. It also allows you to extract unwanted colors which might exist at the edges of any object that is on the foreground.
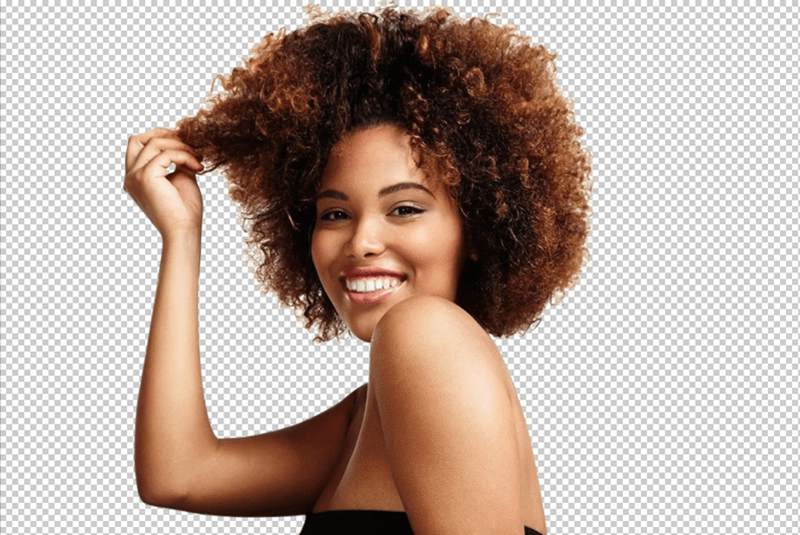
Use pen tool to select the hand and body part which edge is soft. And then you have the final image without the background and you can use any background you wish.

5. Channel Mask
Also called an Alpha channel or selection, the channel mask is basically an extra channel that is added to an existing image. It basically stores the selected images in the forms of grayscale. You may add other alpha channels to generate and store more masks. You may also use this tool to make image background transparent. Follow these steps to do so:
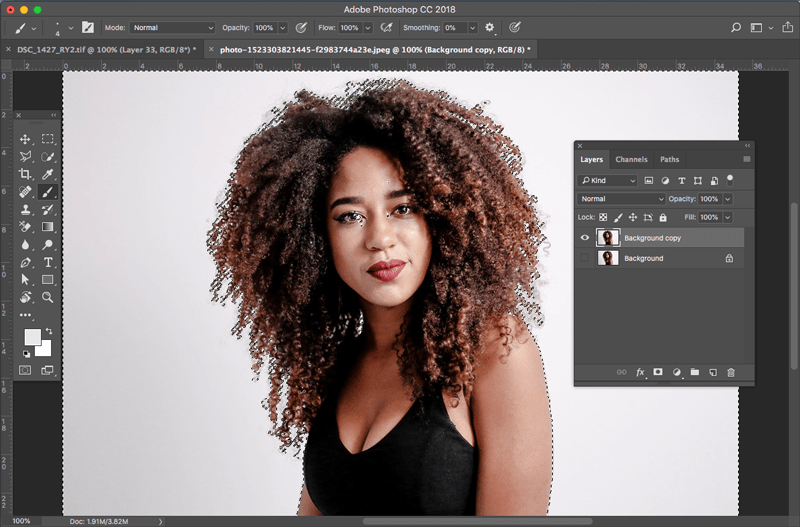
Step I: Make a duplicate layer of the image
Duplicate the image to create a back-up.
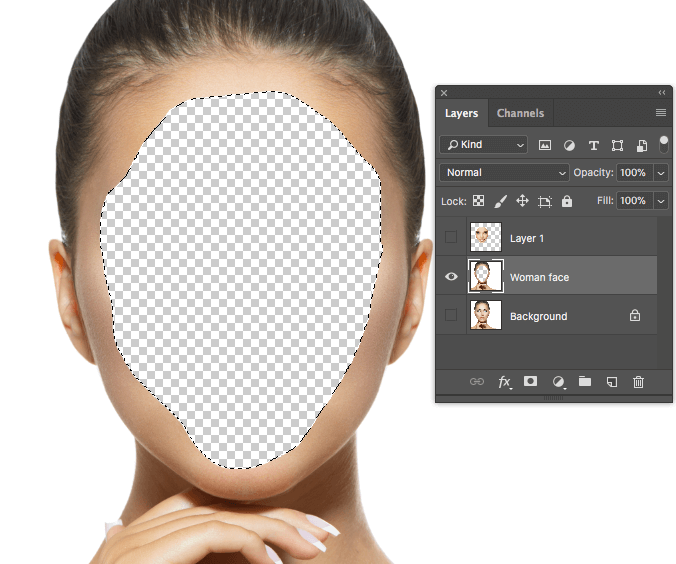
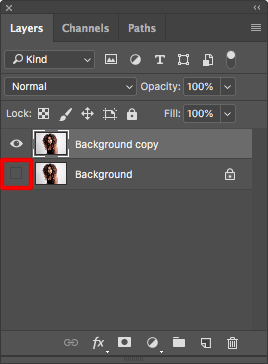
Step II: Hide the Background Layer
Once you are done with creating a duplicate of the image, hide the background by clicking the visibility icon.
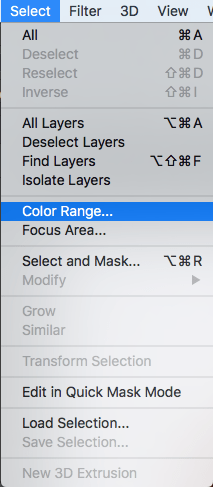
For the channel mask open ‘color range’. To do this, click and then the ‘color range’ from the main select menu.
When the ‘Color Range’ dialog box opens, select the ‘Left Eye Dropper’ tool and then click on the background color in the pink image window. This color shall turn white upon clicking it.
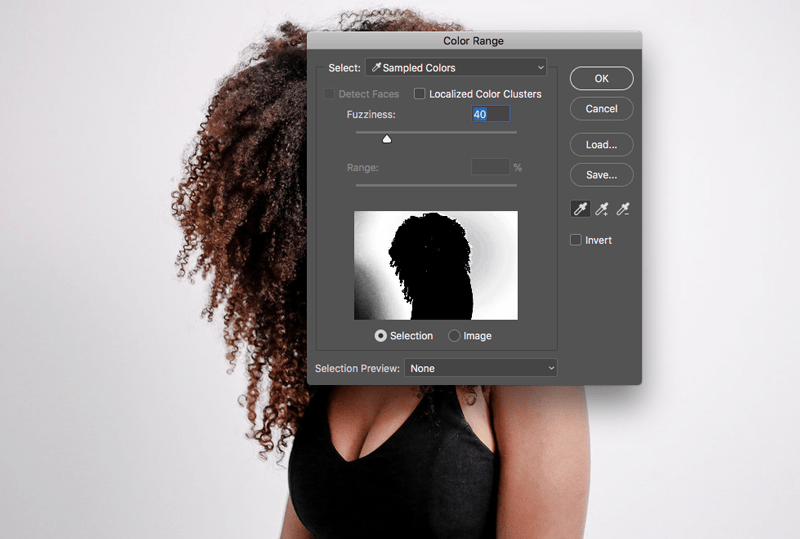
PS: Move the Fuzziness slider out and about until the image is mostly black. This is to remove the background completely. In case you wish to add color, click the ‘eyedropper tool’ using the ‘plus’ sign and click anywhere in the image. Finish by clicking OK.
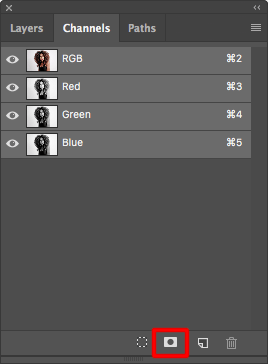
Step III: Save the Selection As Alpha Channel
Select the appropriate button to save the selection. To do this, switch to the Channels palette. Click the ‘save’ selection as the ‘channel button’. It is the second button that is at the bottom of the channels palette.
You will notice a new alpha channel. Press the Ctrl button or the Command + D to deselect https://osterreichische-apotheke.com. Click the Alpha 1 in the channels palette thereafter.
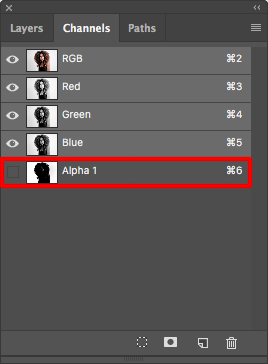
The main window shall now become black and white in color. Keep the black areas and leave out the white areas.
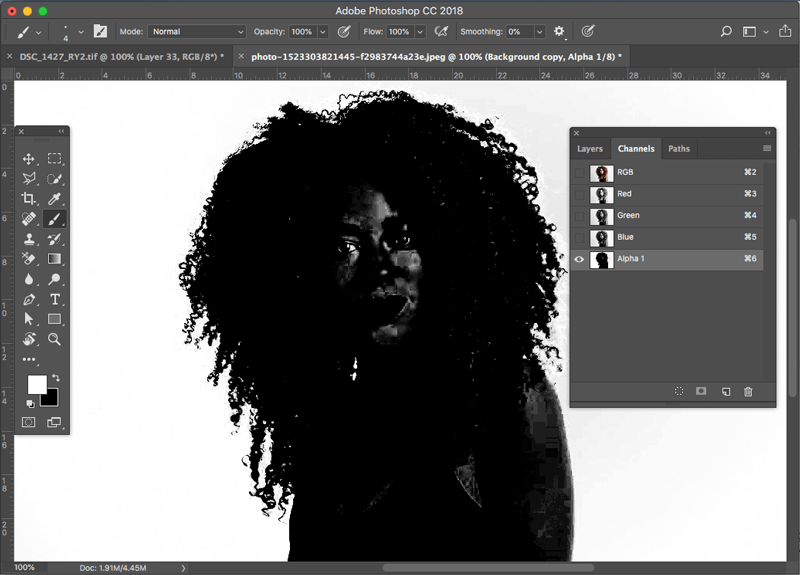
Step IV: Fine-tune the Mask
Fine tune your mask. Select a black brush and the edge of the image hard. Use the brush to paint all over the areas that belong to the object to completely mask it out.
PS: Each image is unique. For this reason, you may have to repeat the above steps several until you get it right.
Step V: Change the Background Color
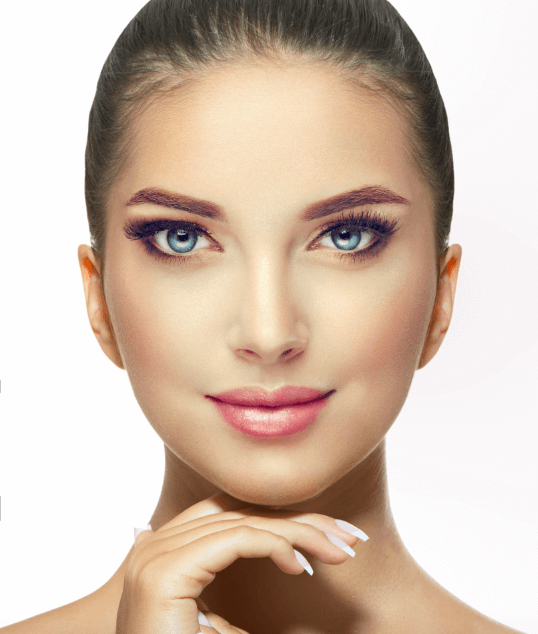
To make the image background transparent using alpha channel hold down the Command key and click on the new alpha channel 1 to select the masked area and then delete the background. Now you have the image with transparent background.
You can now change the background color to any you wish.

As you may well have noted, it is quite complicated to make image background transparent. This is because the undertaking is quite involving, time-consuming not to mention requiring a great deal of technical expertise and experience.
Short on time and not sure how to make image background transparent by outsourcing? Learn how to outsource image editing for eCommerce.
You definitely have to practice repeatedly and for longer to be able to attain the necessary skill and expertise. Alternatively, you may also wish to invoke the assistance of an expert in the field of background removal service to be on the safe side.