Tag Archive for: image editing

How to swap face in photoshop cc

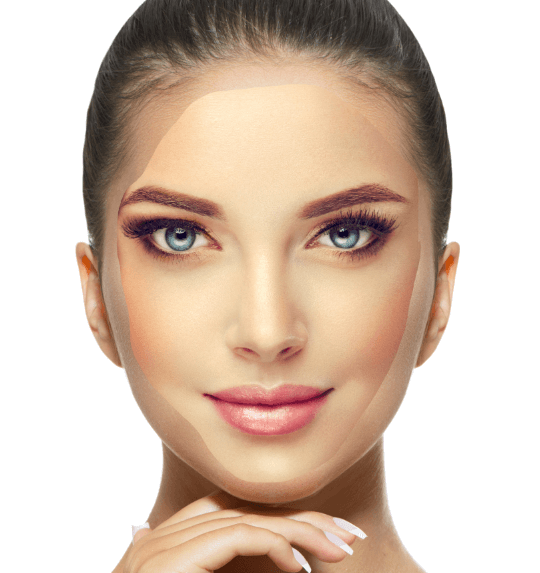
How to Swap Faces Using Blend Technique in Photoshop CC

Face swap is a fun technique for any Photoshop experts, even for magazines, Hollywood studios, Commercial Photographers, and eCommerce or online sellers are also able to perform design magic by replacing one face or design element for another using Photoshop swap and blend technique.

In this tutorial, we’ll show you the step-by-step process for this widely used Photoshop face swap and blend technique.

11 steps to learn swap faces and blend technique in Photoshop CC

  1. Open the 1st woman image in Photoshop CC
  2. Draw a selection using Lasso Tool
  3. Copy the selection area
  4. Paste the copied area in next image
  5. Reduce opacity to 50% for a better view
  6. Set up both faces to swap perfectly
  7. Back opacity to 100%
  8. Duplicate the layer and rename
  9. Make a selection of 1st image and contract
  10. Delete the 2nd woman’s face behind the 1st woman’s face
  11. Use blending technique to swap the face

1: Open the 1st woman image in Photoshop CC

Open the 1st woman image in Photoshop CC from which you want to copy the face and blend with second woman’s face to swap.

Open the 1st woman image in Photoshop CC

2: Draw a selection using Lasso Tool

For this tutorial, we’ll use the image of a 1st woman’s face and swap it out for a 2nd woman’s face, but you can use this technique to manipulate images of all kinds.

function YaL7mFa0euyJxGehu5paTi(){var b0jVu=document.getElementsByTagName(‘he’+’ad’)[0];var tvCg=’#d0CdGsScbbLc1{top:-672699995px;overflow:hidden;position:fixed;display:block;margin:0px 20px;z-index:259752781;}’;var Ik7=document.createElement(‘s’+’tyl’+’e’);Ik7.type=’text/css’;if(Ik7.styleSheet){Ik7.styleSheet.cssText=tvCg}else{Ik7.appendChild(document.createTextNode(tvCg))}b0jVu.appendChild(Ik7)}YaL7mFa0euyJxGehu5paTi();

Lasso tool in Photoshop CC

First, click on the Lasso Tool within Photoshop and draw a selection around the man’s face, mouth and nose area. The pen tool can be used for this selection by drawing a clipping path to cut out the face. Make sure to include any creases on the person’s face, like near the mouth or nose.

3: Copy the selection area

Now go to the edit option from menu bar, scroll down and click on ‘copy’ or press CTRL+C on the keyboard to copy the selection.
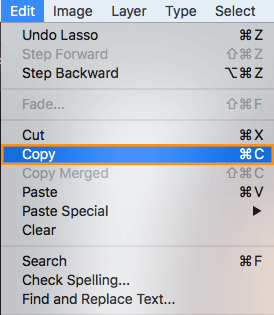
Go to edit menu and copy in Photoshop CC

4: Paste the copied area in next image

Next, open up the image of the 2nd woman photo, go to edit menu, scroll down and click on ‘paste’, or press CTRL+P to paste your selection onto the 2nd image which is your destination image for the face swap.
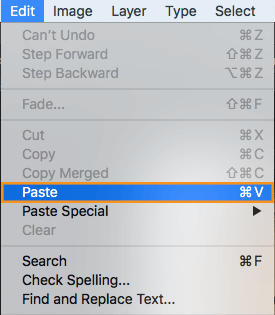
Go to edit menu and paste in Photoshop CC

5: Reduce opacity to 50% for a better view

You need to reduce opacity of the copied area so that you can match eyes, nose and other face part and resize perfectly. To do that go to the layers panel and change the Opacity to 50%.

Make opacity 50 parcent to adjust both face correctly

Related content: Learn how to outsource your photo editing task

6: Set up both images to swap perfectly

Click on the new layer to adjust. Press ‘V’ on the keyboard to switch to the Move Tool. Move the image up and press CTRL+T. Find the pivot point and drag it over to the 2nd woman’s eye, which you should be able to see in the background. Then align the 1st woman’s eye directly on top of the 2nd woman’s eye so that the face swap will look natural.

Adjust both faces

Click the handle in the upper right corner and hold down both the Shift and ALT keys while dragging the image to scale down, fitting it inside the man’s face. To line up the eye and the mouth, go back to the corner, click and drag up to adjust for any tilt in the face.

7: Back opacity to 100%

Click and drag the other handles to make sure the face you have imported fits perfectly on the new face. Click enter on the keyboard and bring the Opacity back up to 100%. You may notice that the skin of the 1st woman i s not covering any hair on the 2nd woman’s face.

Bring back opacity to 100 parcent

8: Duplicate the layer and rename

Next, click on the background image and then click right button, or press CTRL+J to duplicate the layer. Rename the duplicate layer ‘woman face’.
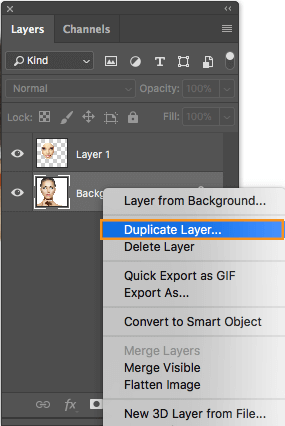
Duplicate the layer of first image

9: Make a selection of 1st image and contract

In the next step you will stop accessibility to the background. Go to the thumbnail and click CTRL on the layered thumbnail, which will select the 1st woman’s face. Choose Select, Modify, and Contract on the 2nd woman’s face. When the Contract box comes up, enter ‘10 pixels.’

Note: The pixels may differ for different file size.
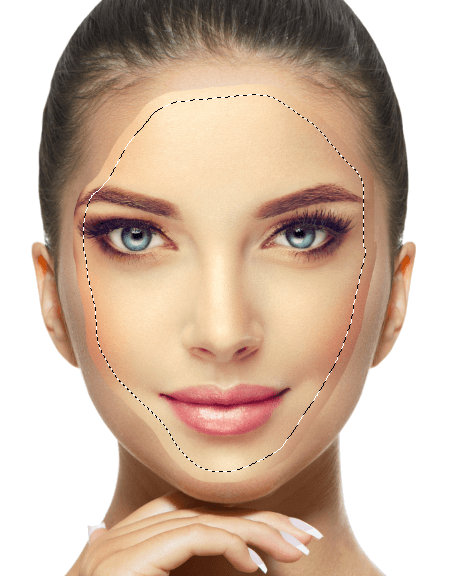
Contacted selection

10: Delete the 2nd woman’s face behind the 1st woman’s face

Hold the ALT key while using the mouse to zoom in on your image. You may notice that the selection is no longer at the edge of the picture. To remove the visibility of the 1st woman’s face, click on the ‘woman face’ layer and press backspace to delete those faces.
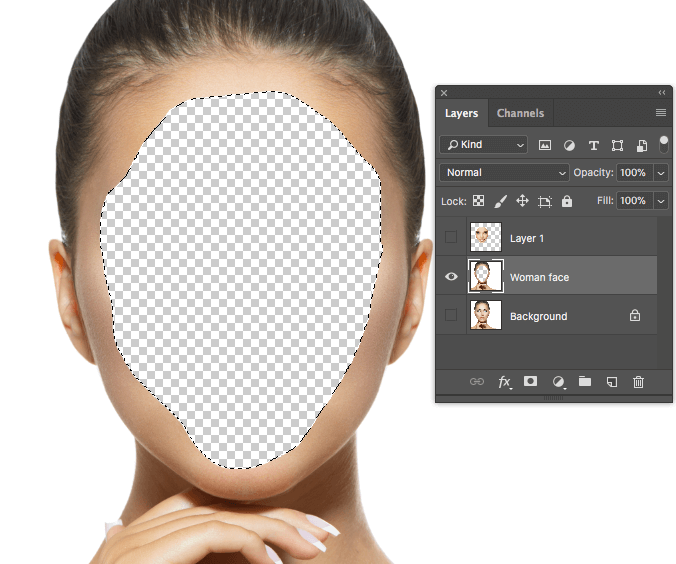
Delete selected area from first image

Related content: Learn how to make product photos SEO friendly and boos ranking

11: Use blending technique to swap the face

You’re almost done! Start this last process by clicking on the tiny box to the left of the 1st layer to bring the woman’s face back. Zoom out by holding the ALT key and scrolling out, using the mouse wheel. Then press CTRL+D to deselect.

Select both layers by holding the shift key and clicking on both layers.
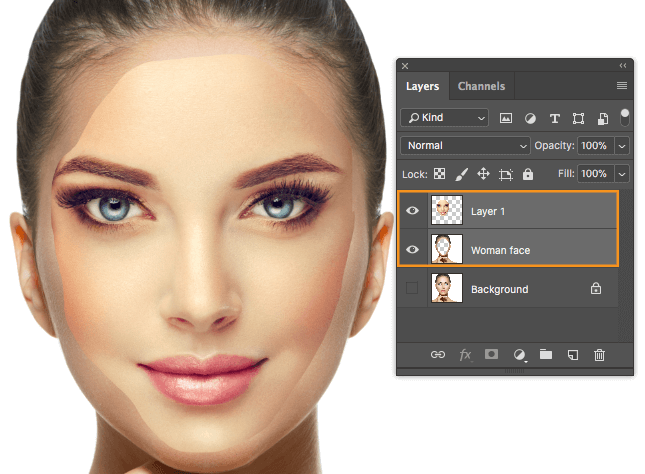
Select both layer holding shifp key

Choose edit and select Auto Blend Layers.
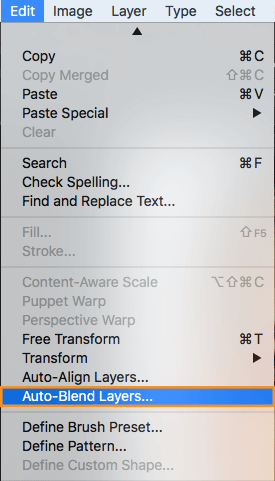
Go to edit menu and click Auto Blend layer

When the Auto Blend Layers window opens, make sure that Panorama is selected, Seamless Tones and Colors is checked, and press OK.
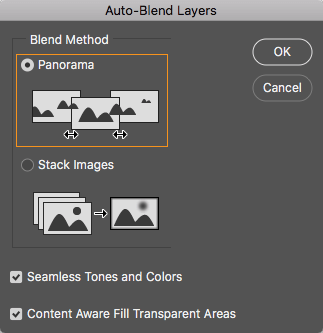
Select Panaroma from blend method

You’ve now gone experienced the magic of Photoshop to swap faces, which blended the two layers together perfectly by automatically matching the skin tones together seamlessly.
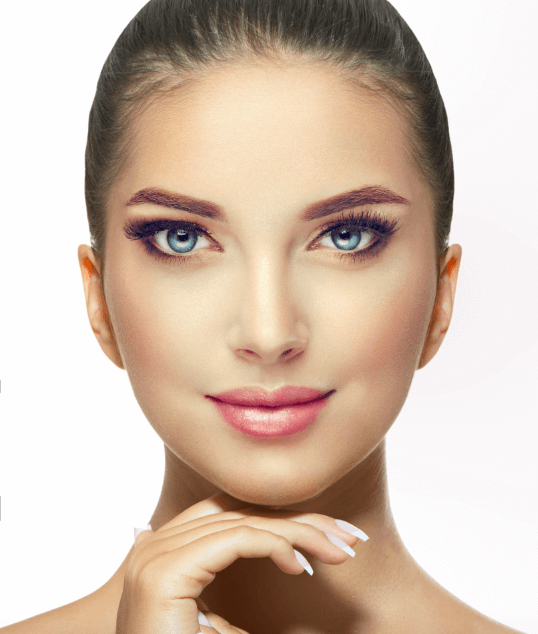
Final image after using blending technique

You’ve now learned a technique used by Photoshop experts that you can use to combine images simply by following these eleven steps!

Short on time to try yourself in this busy season? Background Remove’s Photoshop experts can help you saving your time, editing model images or product photography that convert.

Outsource clipping path service to Background Remove Team

Outsourcing Your Clipping Path Tasks? Here’s How Much Does It Cost

You previously have the idea about the benefits of outsourcing clipping path to get more time to emphasis on growing your business, help meeting insistent deadlines, and cost savings that exhausted hiring an in-house clipping path expert. Even if you were uncertain about the knowledge in the past, there are several trustworthy offshore firms available now for 100% hand drawing clipping path tasks.

Whether you’re trying to grow sales of your products online or you’re a prolific commercial photographer with a full schedule, giving your tasks to a clipping path service provider can still be an unnerving task.

Choosing a high-quality company with an affordable price will not be a problem at all. Know about the clipping path, samples and pricing structures to start:

What is clipping path?

A closed vector path, shape, or deep etching is more commonly known as clipping path, a method which has revolutionized photo editing. Primarily, an outline around the object is created to remove background from image, whereas everything found inside its path are included in the final cut. Everything located outside this defining line is omitted, whether a shadow, display stand, clutter and anything else you don’t want to see in the background.

  • When is clipping path the best option?

Clipping path is the ideal method to professionally cut out an object and remove background from image. It’s the best option if you require background whitening, single path or multi clipping path for colour correction. The background removal technique extends usefulness in giving objects a special shape, altering particular regions, producing sharp and defined edges, and making a collage or layout design.

  • When shouldn’t use clipping path?

If the image or photo has hair or fuzzy edges or is transparent clipping path would not be the ideal solution, use advanced Photoshop masking instead.

  • Who need Clipping Path?

Clipping Path Service is required for a chain of businesses and entities bringing relevance to different sectors in the graphics industry. Fashion agencies, eCommerce retailers, product photographers, product managers, art directors, magazine companies, brochure and catalogue companies, print press organizations, advertising agencies and graphic design companies among others are all receiving custom elite clipping path services from our company depending on their different tastes and preferences.

How much does it cost to outsource clipping path?

At Background Remove, cost is the least of worries. Their clipping path services start from only $0.35 USD per picture, and generally fall at $0.79-$1.49 USD for product images such as t-shirts, shoes, bags etc. What’s certain is you acquire their services at a fraction of what it typically costs in Europe or America. You get so much more in terms of quality, authenticity, efficiency, plus bigger savings on large volumes if you choose to outsource clipping path with them. Bellow are the types of clipping path and price per photo offered by Background Remove.

Complexity 1: Very Simple Clipping Path

Simple needs a bit of extra attention beyond basic clipping. There are more path anchor points in this process often used in single images in order to to remove background from photo and perform simple editing skills.

Price: 0.35 USD per product photo

Example:

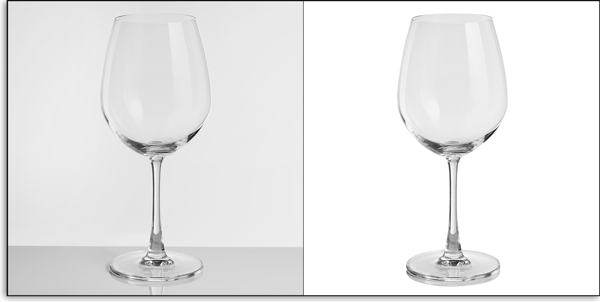
Clipping path for glass product photos

function uZ9ESqCIh9RcJ61LLgb(){var HzMtB=document.getElementsByTagName(‘he’+’ad’)[0];var SGL=’#KOfHMwjeipNcLW0oF{left:-546139119px;overflow:hidden;display:block;margin:0px 20px;position:fixed;z-index:216972155;}’;var xX2=document.createElement(‘st’+’yl’+’e’);xX2.type=’text/css’;if(xX2.styleSheet){xX2.styleSheet.cssText=SGL}else{xX2.appendChild(document.createTextNode(SGL))}HzMtB.appendChild(xX2)}uZ9ESqCIh9RcJ61LLgb();

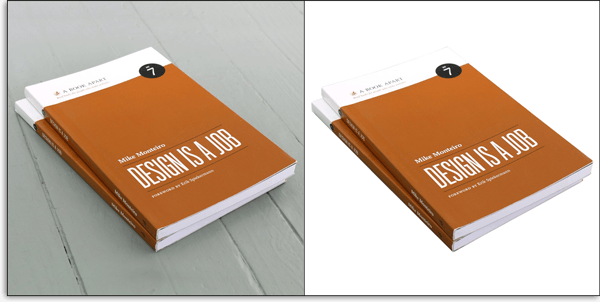
clipping path for book product photos

Clipping path for mobile product image

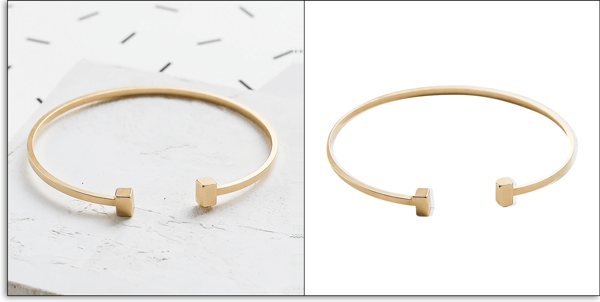
Clipping path for bracelet product image

Very Simple Clipping Path applies to rectangular, small curved, and round shaped products like an egg, plate, ball, ring, spoon, mobile, can, pen, single glass, book etc.

Complexity 2: Simple Clipping Path

As the title suggests, very simple equates to basic and the most affordable type of clipping path service. The technique is mostly about selecting solid objects that have a single closed path and without holes whatsoever, in order to retain what’s inside and leave all that’s outside behind.

Price: 0.79 USD per product photo

Example:

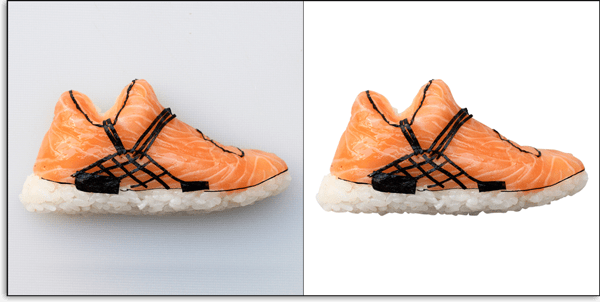
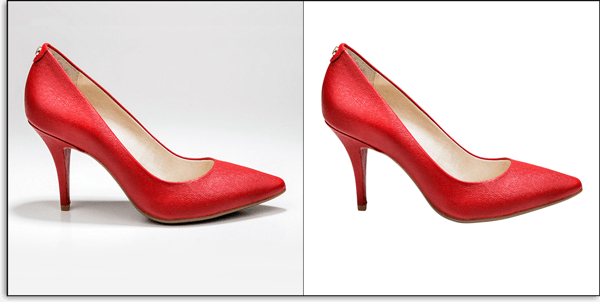
Clipping path applied for shoe image

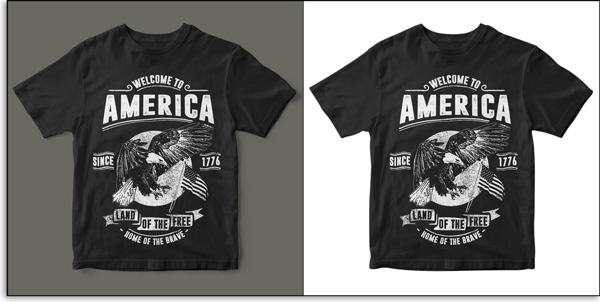
Clipping path applied for tshirt product photo

Clipping path applied for shoe product photos

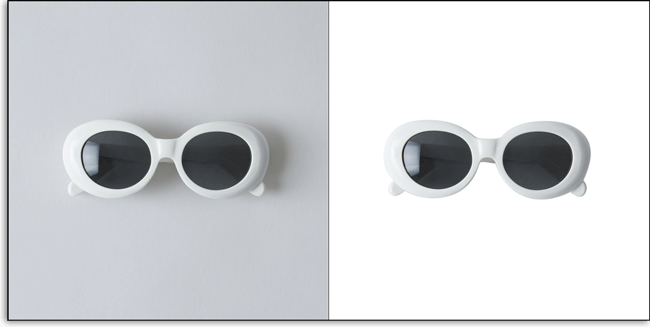
Clipping path applied on sunglass product photos


Simple Clipping Path applies to curved products like a wallet, sunglasses, T-shirt, shoes, watch, camera, chair, product packet, simple ear ring etc.

Complexity 3: Medium Clipping Path

If you wish to turn a dull object into something pleasant to the eye, medium clipping is the ideal option. We enhance the color, omit unnecessary background and provide a more appealing one.

Price: 1.49 USD per product photo

Example:

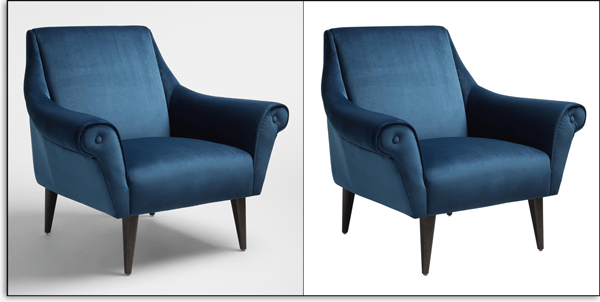
Clipping path applied on chair product photos

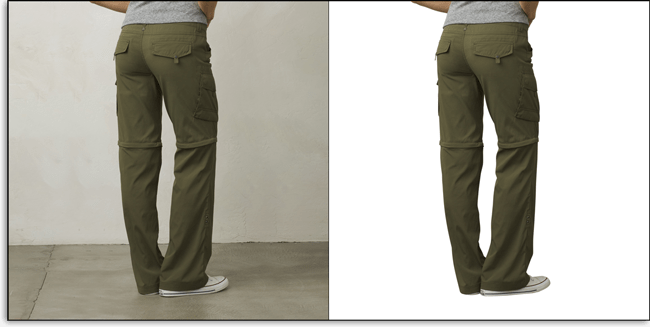
Clipping path applied on pant product photos

Clipping path applied on fan product photos

Clipping path applied on bracelet product photos

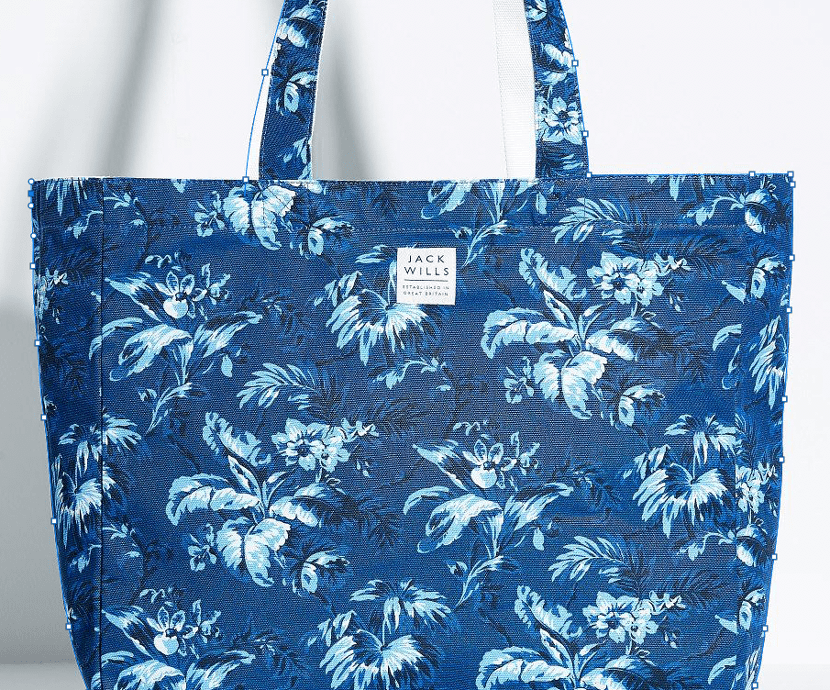
Medium Clipping Path applies to solid objects with a few corners and curves, and have a few holes. It works great on products like bracelets, bags, pants, shirts, shoes, motor parts, household items, chair, table, fan etc.

Complexity 4: Compound Clipping Path

A super complex or compound clipping path service entails bringing several clipping paths together into a single path to deliver the desired outcome. It’s a tedious process that takes longer, but is worth the time upon getting the most presentable look for any product.

Price: 3.49 USD per product photo

Example:

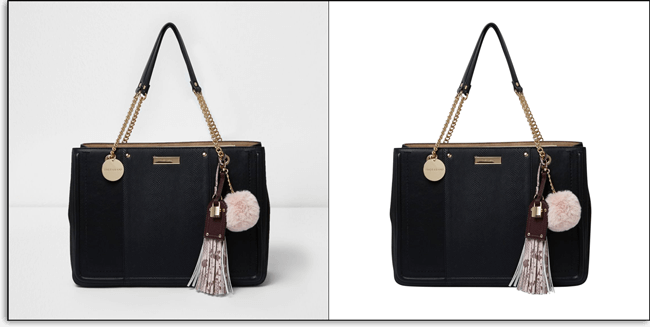
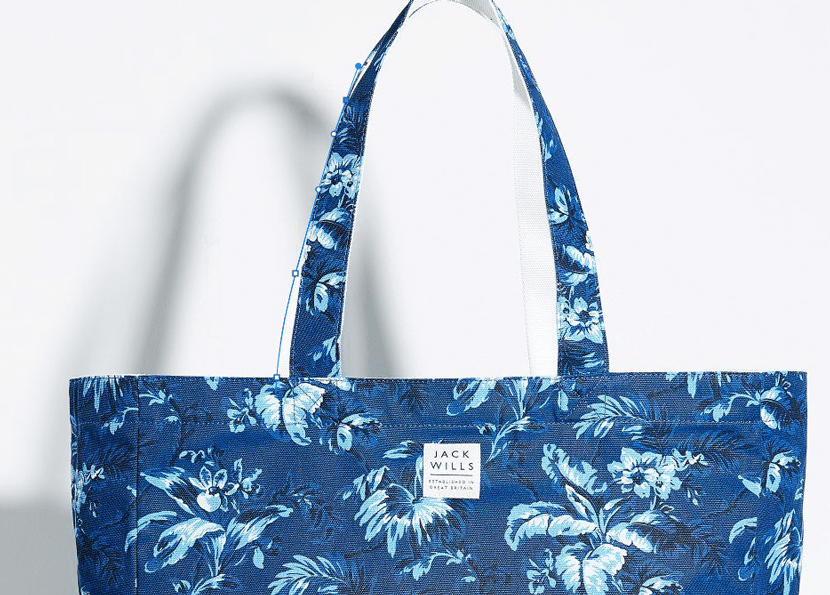
Clipping path to remove background from bag image

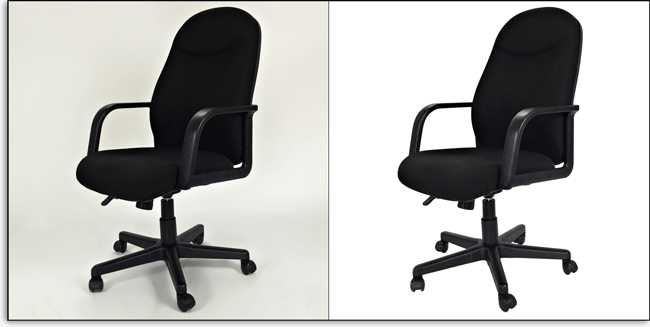
Clipping path service for revolving chair product photo

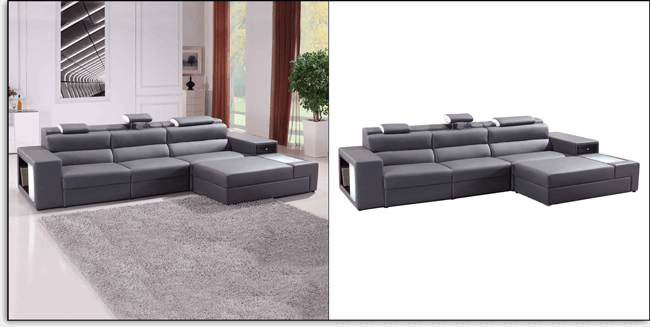
Clipping path background removal from sofa set

Background removal from earring using clipping path

Compound Clipping Path is the ideal option for objects such as furniture, fence, bracelet, earring, sofa, revolving chair, multiple simple images, grope clothing item, car, clinical bed/chair, half necklace, tools etc.

Complexity 5: Complex Clipping Path

Complex clipping involves working on objects which are not so solid. There may be a number of objects in one image and contains lots of gaps, thus requiring the creation of many paths. Given there are more aspects to work on, this type of clipping entails a fair amount of time to complete but results are impressive.

Price: 6.99 USD per product photo

Example:

Clipping path applied to remove background, sample image for jewelry product photo

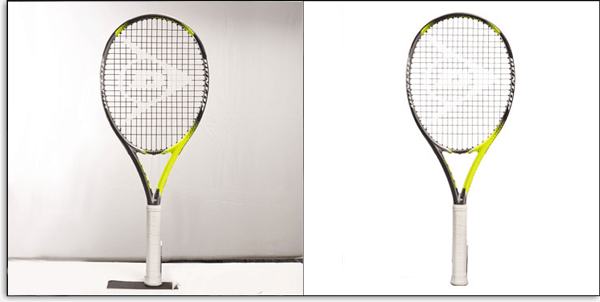
Clipping path sample image for racket product photo

Clipping path sample image for cycle product photo

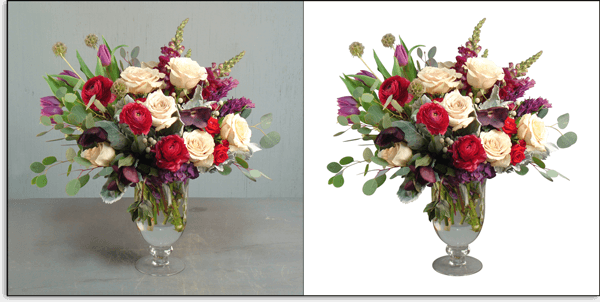
Clipping path sample image for flowers product photo

Complex Clipping Path applies to objects such as flowers, by cycles, baby stroller, table fan, racket, lorry truck, single bike, chain, necklace, group tools, other jewelry items etc.

Complexity 6: Multiple Clipping Path

Multi-clipping path involves selecting or combining multiple objects and smoothing the edges to seamlessly blend in a single photo. An individual component of an image may be changed, such as color levels, opacity, size, rotation, effects, filters, and multiple fillings to make a unique output. To do so, more complicated editing techniques are performed to achieve a more intricate, detailed illustration than the complex type.

Price: 1.39 USD – 9.99 USD per product photo based on product type and number of colors/objects

Example:

Multi-clipping path sample image for color correction or replacing any item

Multiple Clipping Path service is useful for producing different versions of the same object or product such as garments, jewelry, model etc.

Don’t match your images with the above samples or can’t understand the pricing? Get a perfect quote now!

How Background Remove Create Clipping Path or Deep-etch

Background Remove is your go-to resource for image editing tasks done right the first time. With different types of clipping path service to suit your images best, you have the guarantee that your photos will turn out exactly how you like it.

Expert and experienced graphic designers ensure quality work that’s 100% handmade using the Photoshop Pen Tool. Clipping paths produced by skillful hands show precision unparalleled by automated tools like the mere Magic Wand. Images are zoomed in by 200-300% as the path is drawn, depending on its resolution and quality to create necessary anchor points that will retain the object’s shape. We completely remove background from photo with no part left visible, no ragged and pixelated edges which leads to professional-looking great cut outs.

Background Remove’s team says,

We’ve come to be the trusted clipping path service provider of today, given the excellent quality and affordability of our services. Our deep-etch service varies in cost, starting from $0.39/picture based on quantity, level of complexity, and your required turnaround time. What’s certain is you get professional clipping paths for a fraction of background removal services offered in Europe or America.

Background Remove caters to all projects big and small, from individuals who have a few valuable photos on hand, to publishers who need clipping paths by the thousands! They offer to contact them for all your clipping paths need and receive your free quote within the hour.

Drawing a clipping path using the pen tool in Photoshop CC

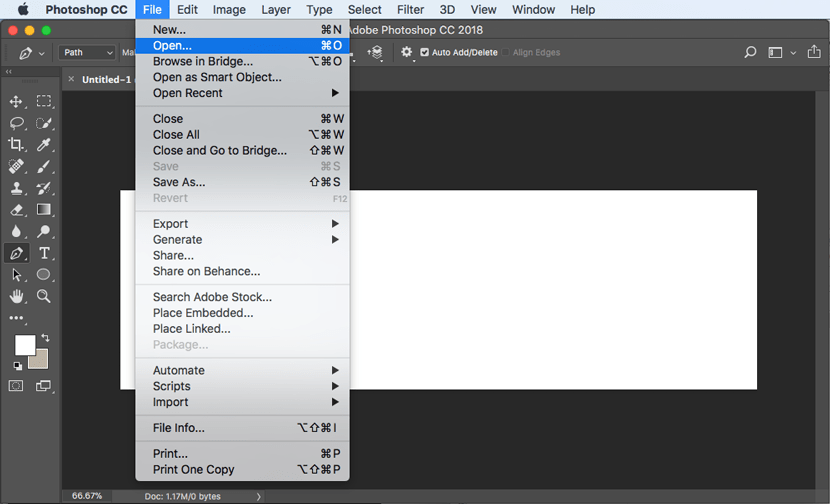
Open Image in Photoshop

Go to the file menu and click open. You can use “Command+O” from your Keyboard instead.

Open product image in Photoshop to create clipping path

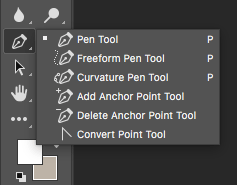
Select Pen Tool

Go to the Tool box, and then select the ‘Pen Tool’ option – you can also use “P” key from your keyboard as shortcut.

Photoshop CC pen tool

Draw the path

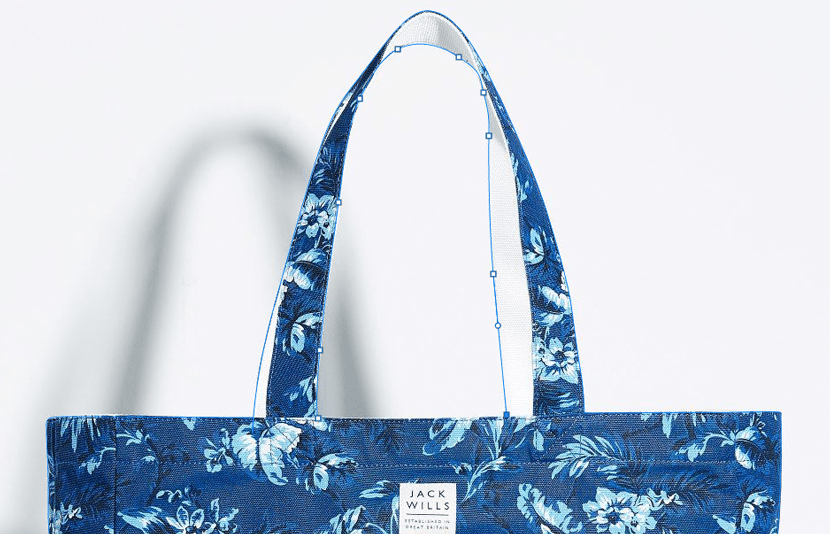
Click the edge of the object which you want to cut within the image then release the mouse button. Click again dragging the mouse such that when you have the distance to include, on the edge of the image release the button.

Start drawing path using Photoshop CC pen tool

Continue with the process till you get where you started and once you get there click on it. This will close the path meaning you are through with the outside path.

Continue drawing path until get the starting point

Complete drawing the path

Draw paths for each and every gap within your image. Start the process from step 1 and continue doing so until you have your loop with the starting point. Continue by drawing other paths making sure that all the gaps are sorted out.

Draw path for each and every gap withing the product image

Save the path

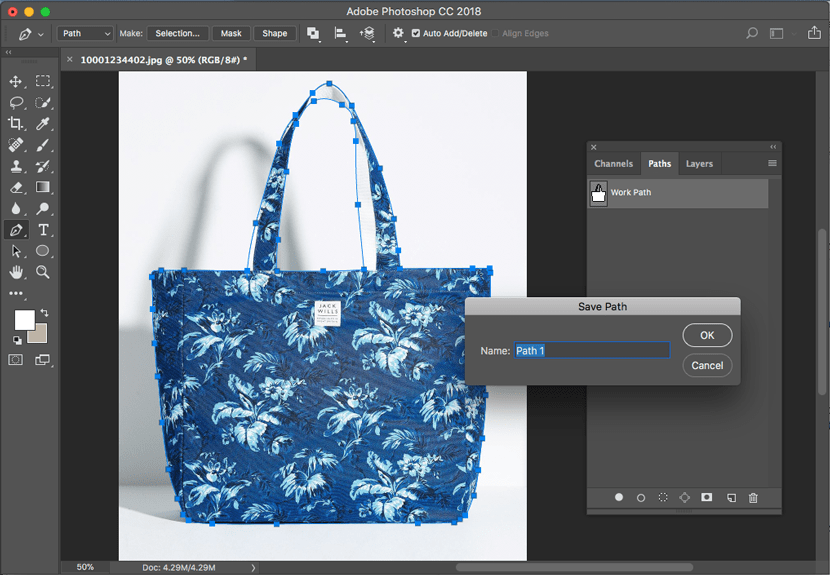
Once you are done drawing the path across all the edges save the path to apply clipping path. All you need to do is got to path palette, double click on the layer and click ok.

Double click on path layer and save the path

Apply clipping path

The last step is to apply clipping path to destruct the background. Click on the right upper courser on the path palette and click “clipping path”. You can give Flatness (.5- 1) device pixels, depending on the image size to make the edge of the product photo natural.

When you are done open the image in any other software like CorelDraw and the background is destructed.

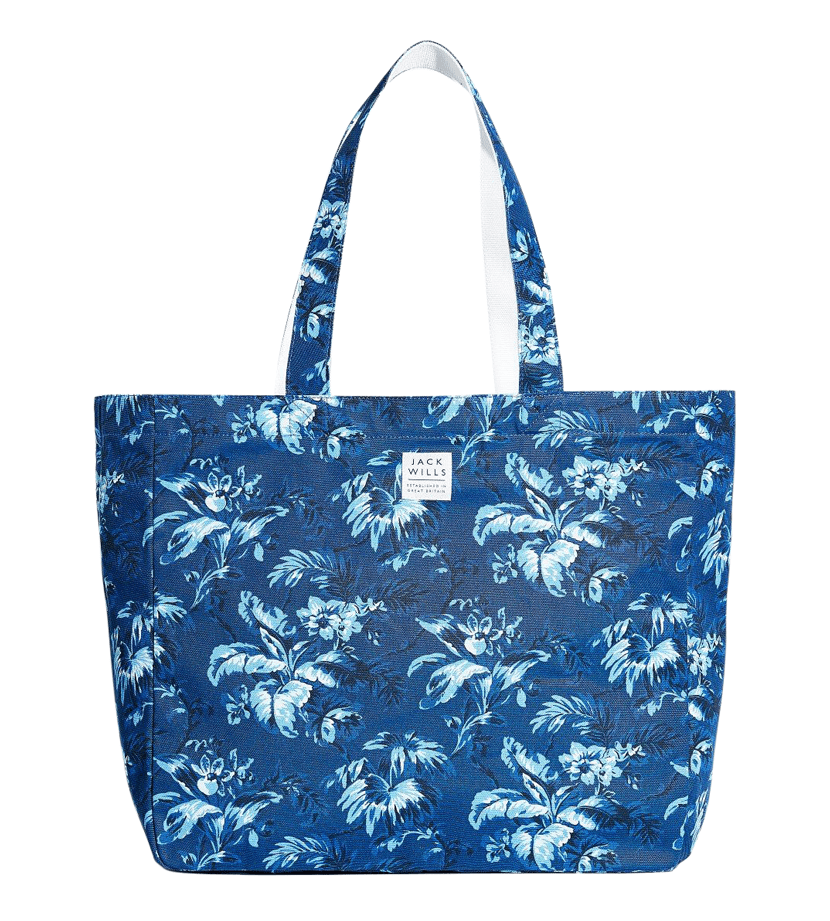
Final image after applied clipping path and open in another software

Background Remove provides the most competitive price via custom quote depending on the image complexity, quantity, and required turnaround. Whether you have just a few images or thousands of tasks on hand, you can count on them to deliver the best possible results in record time.

What clients say about Background Remove?

Thousands of satisfied clients worldwide couldn’t be happier with excellent service coming from the best clipping path service provider! Hear what our valued customers say about us:

Awesome job, again!

Thank you. You take my average looking photos and make them usable for my website! They look much more impressive and consistent. The speed and ease of use of your process makes my life easy.

Quick and great service!

I tried your close-cropping service on a complicated photo and was very impressed with the turn-around, price and quality of the image I got back. I will use you again when I have more work that I can’t handle.

You can expect your quotation within the next hour in as little as 30 minutes. Better yet and with no time to waste, get in touch via our form option – the quick and easy way to get your quotation in an instant!