Jewelry Product Photography: Shooting and Editing Ring in Photoshop CC18
Jewelry Product Photography is a niche field that requires skill, knowledge, and patience. Capturing the perfect image of jewelry can prove to have its challenges. When equipped with the right tips, tools, and steps even a novice photographer would be able to take create astonishing photos.
Here are 60 photography sites with amazing product photos that inspire.
Jewelry product photography and editing tips:
There are a number of factors that are relevant when it comes to jewelry photography such as the lenses, angles, and tools. Here are some easy to follow, shooting and image editing tips to consider.
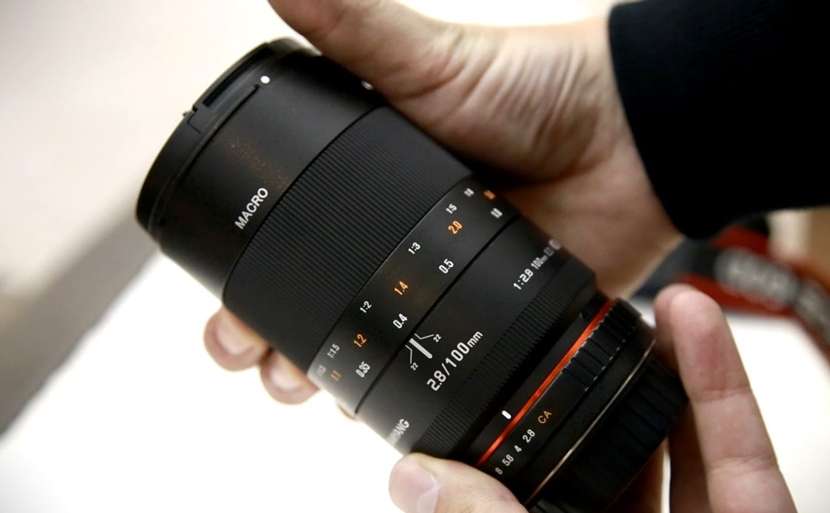
1. Choose a Best Lense
Macro lenses work best for jewelry product photography. They work great to capture fine details of small pieces of jewelry such as rings. The 100mm f2.8 lens is the chosen favorite. It has a shallow field of depth but works great for rings. A great choice for cropped sensor cameras is the 60mm f2.8 EFS lens.
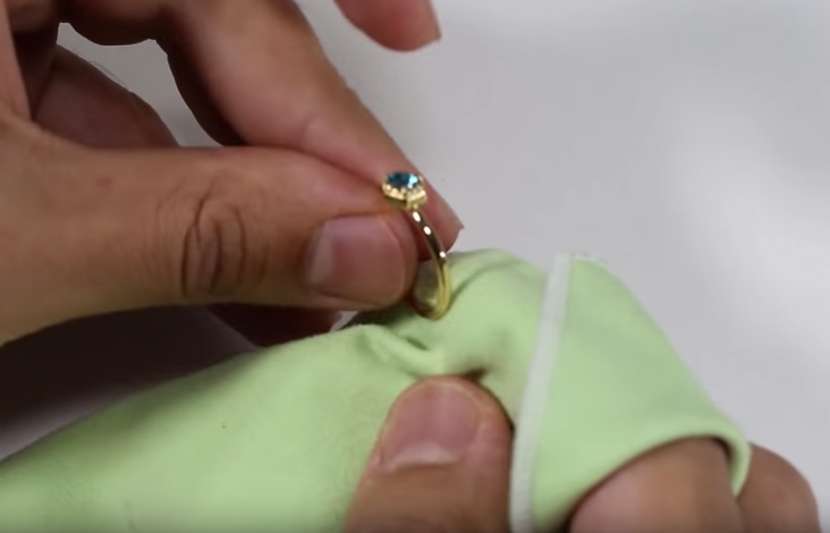
2. Clean the sample
Always clean the jewelry before you begin your shoot. The jewelry may have oil, fingerprints, etc. which could alter the photograph. Rubbing alcohol and a microfiber cloth is perfect to clean the shank and setting area. Q-tips work well but can leave fibers in the setting area around the gem so be careful.
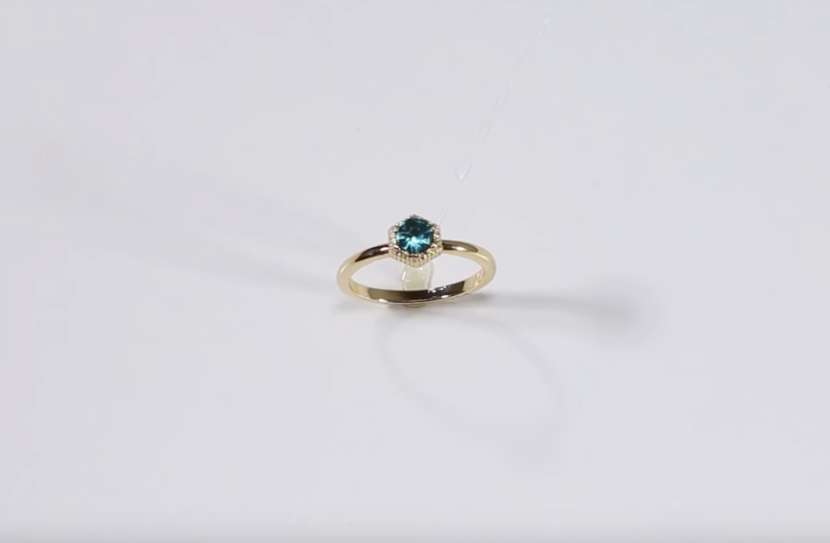
3. Use a large whiteboard
Use a large whiteboard or piece of acrylic to work on when shooting. The larger the board the better. The board will reflect in the lower shank of the ring. When shooting reflective objects, look at it from the angle you plan on shooting from and use your finger to trace what is being reflected.
4. Use hot glue gun
To hold the ring in place, a hot glue gun works best. It’s quick and simple to get the ring set into place and when the glue dries, the hold is very sturdy. This is helpful when you need to make any last minute touch-ups to the ring.
The glue peels off from the metal of the ring easily leaving no streaks or residue on the metal. 4. Sometimes clients will use floor samples for jewelry product photography. It’s a good habit to practice not getting the rings too dirty.
5. Lighting setup
Roll a large piece of white paper into a tube but leave a small window for the camera. This is perfect for rings because it evenly fills the entire surface although it has a low contrast look. This is great for shooting a high volume of jewelry product photography for e-commerce. For high-end editorial photos, you need a balance of white and black.
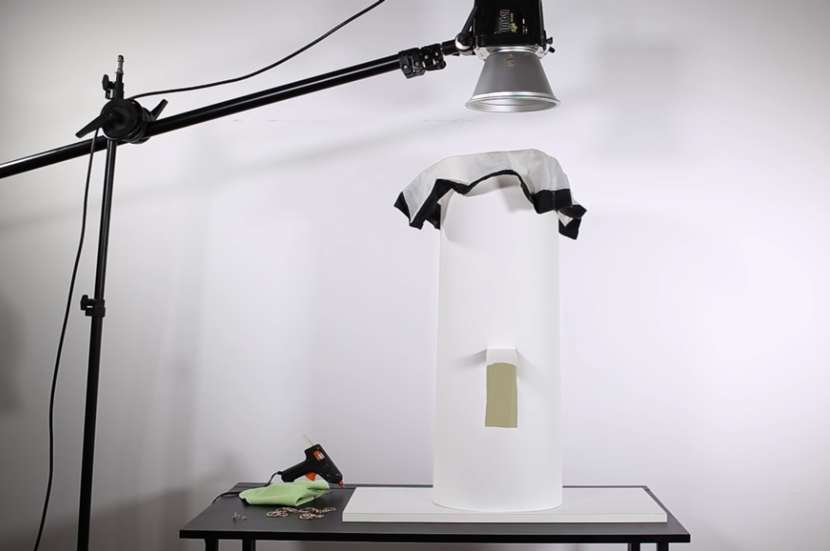
One light with a piece of diffusion to diffuse the light. This setup works well with a softbox or any other modifier. Bare bulb setup works best. Harsh light may be necessary to capture contrasts of the gems and composite the gems into the body of the ring later in photoshop.
Clients will want various angles of the ring. Create multiple tubes with windows at various angles for different views and client requested angles for jewelry product photography.
When the ring is clean and set in place, frame up on the ring. You can see the dark reflections without the tube. Once the tube is placed there is an even fill around the ring with highlights from the top of the tube.
6. Perfect Angles
For jewelry product photography standing at the 45-degree angle, the window is much higher with the camera pointed almost straight down. The shank of the ring is at an angle with the gem slightly off centered.
For front angles, glue the ring to the acrylic earring stand. This is easier and doesn’t require the lens to be pointed straight down. The stand is tilted and supported with erasers. Frame up on the ring then place the tube. Window in this tube is lower and eliminates dark spots in the inner shank of the ring.
For side angles, use a tube with a window on the very bottom which looks like a mouse hole. Sometimes a small white piece of paper may be needed to reduce some of the reflection from the shank. Works well with other side angles leaving a small reflection grin the camera in the shank.
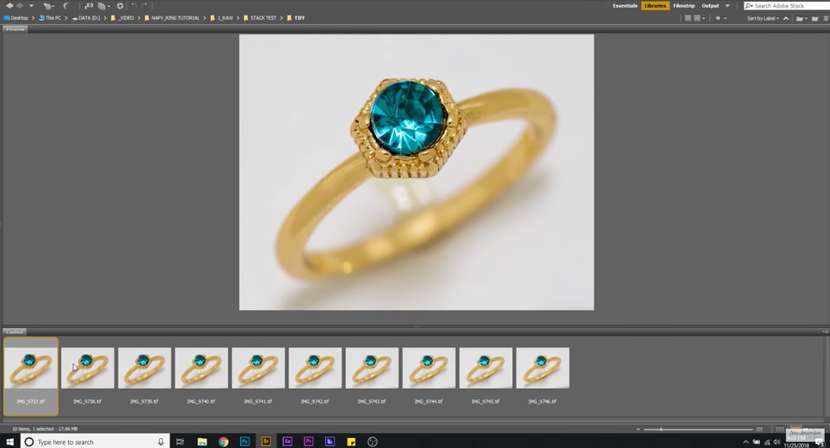
7. Focus Stacking
This is a must when doing jewelry product photography for rings with macro lenses. Focus stacking is a series of images at different focus distances and using software to merge the images together to make a fully in-focus image.
You can use a focus stacking rail that physically moves the camera back and forth to take the series of images, but turning the focus lens works just as well. These are additional image editing tips for focus stacking:
- Make sure there is no camera shake from focusing the lens. The preferred method is to shoot tethered and use the camera tether software to move the focal plane. Using F8 or F11 to shoot each image gives the sharper aperture for most lenses.
- Start at the front of the object and work your way back. Using the Canon EOS utility software the focal plane can be moved at small increments and photos can be taken at each increment.
- When doing jewelry product photography of rings you typically end up with 6-10 images depending on the size of the ring and the amount of detail you want to capture in the shank.
- Once the images are set, batch edit the raw images. This is necessary to do minor exposure, contrast, and white balance adjustments. Do not adjust clarity or sharpness at this point so dust and blemishes are not made more obvious.
- Save the images in .tif or .psd format since focus stacking the raw files can be slower than using .tif format.
8. Focus Stacking with Photoshop

There are several steps for focus stacking images with Photoshop:
- Select File, then Scripts, and Load Files Into Stack.
- Browse and locate image files you want to merge.
- Select all image files and select ok.
- Check the box to attempt to automatically align source images. Which will make small adjustments to the image and make them perfectly aligned. Very useful if there are micromovements between shots.
- Photoshop will process the images and load them into layers. Clicking through the layers you can see each area of the ring that is in focus. The software will stitch each portion together.
- Select all layers and go to Edit and click Auto-Blend Layers.
- Select stack images.
- Click the box next to seamless tones and colors to fix minor exposure changes between shots.
- Select ok.
- Once the stitching is complete, it will make a merged layer at the top with all the images stitched together.
- If there are any blurry areas that the software could not stitch, you can adjust the layer mask manually.
- Adjust the layer masks or using the clone stamp to stamp over the blurred areas.
Image Editing Tips and Steps
There are a number of factors that are relevant when it comes to editing jewelry product photography in Photoshop such as background remove, cleaning, retouching, sharpening, color correction etc. Here are some easy to follow, image editing tips to consider.
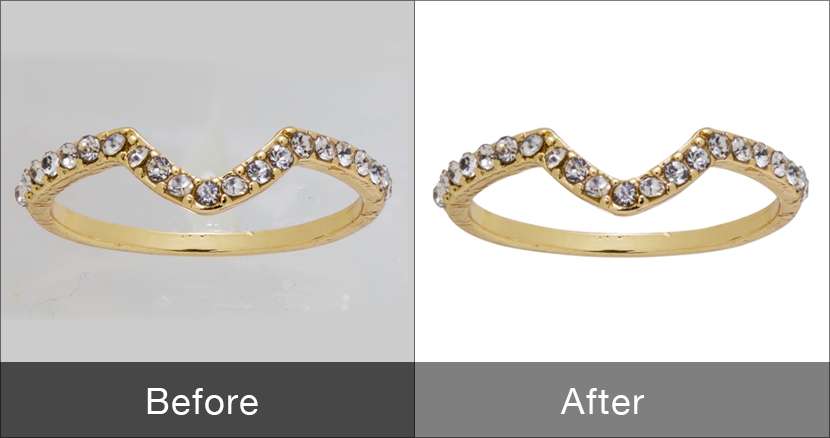
1. Remove the background
First step is to remove the background of the ring image and make the background white. Pen tool in Photoshop CC18 is the best way to create path around image and then change the background to white like the below image.
Here are the steps on using pen tool to create path.
- Press P to select the pen tool. Make a path using the pen tool to cut out the image.
- Use the left mouse click to create an anchor point to start your path.
- Click again to create send anchor. Points are connected with a segment.
- When you make an anchor point, you can hold the left mouse button and drag to alter the shape of the segment which allows you to trace the ring accurately.
- When you click and drag the anchor point, there are two arms that pert rude from the anchor point. One allows you to change the line segment connecting to the anchor point. The other allows you to change the next segment it will connect to.
- Hold Alt/Option to click and drag the anchor point to make changes to the segment you’ve already made.
- Make two anchor points and place a third in the middle of the segment and use Ctrl/Command to drag the anchor point. This allows you to drag the segment around. You can make unlimited anchor points but don’t make them too close together.
- Some parts are easy to make segments on like the stones. You only need to click along each corner. 9. Curved areas take more practice since you need to alter the segment. For the shank, you only need a few anchor points and large segments since it is a long curve.
- Create anchor points and segments around the ring until you reach the first anchor point to close the path.
- When the outer path of the ring is complete, go to the path window to see the path of your work.
- Have the work path selected and select the hamburger symbol (three horizontal lines) and select the save path.
- Name the path.
- Once the outer path is saved, deselect the outer path and create a new path on the inner area of the ring.
- Make a new layer and keep it on the top of all other layers.
- Select both paths.
- Select the outline circle symbol in the path window to turn the paths into a selection.
- Press the rectangle with the circle symbol to create a layer mask on the layer. The layer mask will hide anything that is outside of the selection.
- Press Shift + F5 to open the fill window and fill the layer with white. The ring is now isolated on a white background.
Creating path around a ring only takes a few moments but the time must be factored into the editing time of images. Some offshore clipping path and image editing service providers on the web will create paths for your images and return them the next day in affordable pricing. Pricing for clipping path services can be integrated into jewelry product photography pricing.
Here’s how much does clipping path cost when outsourcing.
2. Touch-Ups
- Using the brush set to 0% hardness at 30% opacity works best and fastest.
- Create a new layer, set the blend to lighten.
- Use Alt/Option to sample the gold color from the ring and start painting along the shank.
- When using the lighten blend mode, it won’t cover any areas that are brighter than the color you selected.
- Target settings and other areas of the ring. For heavy dark spots, use the brush at 100% opacity.
- Use brush at 30% opacity and alternate between highlight and normal tone to create a natural gradient.
- More highlights on the inner shank to keep the ring from looking flat.
- Add noise to the layer to make it more natural once you are satisfied with the lightning.
- Select Filter, select Noise, click Add Noise.
- Add noise with a low percentage of 1% or less.
3. Cleaning
The lighten layer is the quick pass. The second layer is for in-depth refinements. Use the brush tool at 10 to 30% opacity. The clone stamp tool should be used with low opacity. Focus on the stones and fix them one at a time. Darker areas of the stones will be filled with low opacity brush that selected the dark color. Stones need contrast.
A useful photo editing tip is to use the clone stamp tool to remove additional marks, fix highlights on edges of the shank. Use the brush tool to smooth out rough highlights from tarnish that the light layer didn’t fix. Add color to the desaturated areas of the inner shank. A small brush with 0% hardness should be used to refine the edges of the shank and smooth them out.
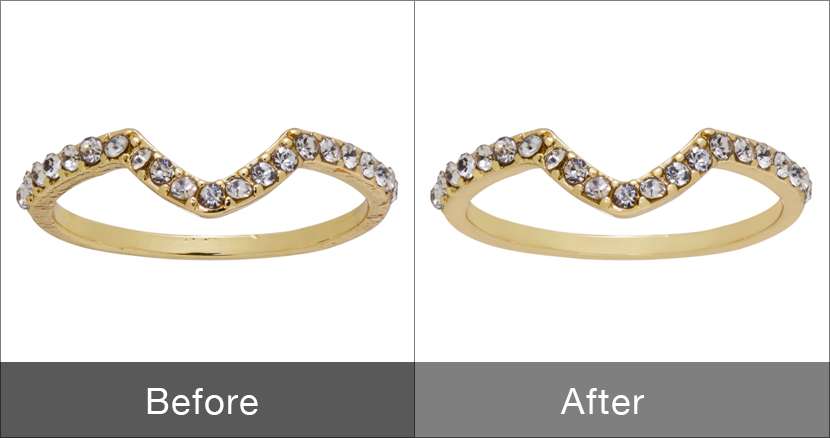
4. Add Some Color
Jewelry product photography clients tend to provide a style guide to ensure the proper colors are selected. Since this is a gold ring, use Yellow Gold, Pantone: 7403 C.

Coloring the image is a very simple task using the layer set to the color blend mode. After coloring the image will be like the below one.
Here are the steps of how to color a ring image in Photoshop.
- Create a new layer to select the gold color.
- Click on color selection on the bottom of the toolbar to open the color picker.
- Click color libraries.
- Select coated/uncoated Pantone library.
- Scroll for color 7403.
- Select color and press ok.
- Use a large brush and paint over the entire area of the ring.
- Blend mode drop-down menu in layers window and select color blend mode.
- Remove access gold from gems.
- Select layer and press rectangle with circle symbol to create a layer mask.
- Select the layer mask and use the brush to paint away the gold color.
- Use 20-40% opacity depending on how the metal was shot and how saturated it looks.
- Select the layer mask of the gold layer just created.
- Right click on the mask and select add mask to selection.
- Create a new layer and press the layer mask symbol to create a layer mask on the layer.
- Since this mask is hiding the stones invert the layer mask (Ctrl + 1/Command +1) while selecting the mask to invert it. Now the mask is only selecting the stones.
- Go to the color picker and locate the 5405 Pantone color for the stones.
- Paint the color over the stones.
- Select the color blend mode.
- Change the opacity to 15%.
- Use the same layer masks to create curves layers to change the exposure on the metal of the ring and the stones.
- Right-click mask of gold color and add a mask to selection. Then create another curves layer.
- Do the same to make another curve layer for the stones.
- Make sure the exposure adjustments are below the color layers so the colors are not changed.
- Create an S curve for the stones so they pop more.
- Do the same for the metal but boost mid-tones as well.
- Layer masks can be used on other layers to make more adjustments to specific areas.
6. Sharpen the Image
Sharpening is best left for last when all of the smoothing and retouching has been completed. This will allow for a consistent sharpening of the entire image. Use the high pass filter set to a hard light blend mode.
- Select the original ring layer and then retouching layers.
- Press Ctrl + J/Command + J to duplicate the three layers.
- Ctrl + E/Command + E to merge the layers into one.
- Select Filter, select Other, and select High Pass Filter. Toggle the filter to a higher pixel amount so that it is a little over sharpened.
- Change blend mode on the layer to hard light.
- Toggle layer with opacity slider to find right sharpness.
- Zoom in to see what the sharpening is doing and toggle until it is just right.
- To crop the image, select Image and select Trim. Trim away all sides.
- Use Ctrl + Alt + C/Command + Option + C to open the canvas size window.
- Select Relative and add 1 inch all around.
- Open canvas size menu again to copy width of the image and apply it to the height to make it a square image.
- Flatten it to reduce file size or save with layer to make future adjustments.
7. Final Correction
Fixing an improperly set stone. When the ring is symmetrical it is an easy fix.
- Select the same stone on the opposite side with a lasso tool.
- Drag lasso tool around the stone.
- Ctrl + C/Command + C to copy.
- Ctrl + V/Command +V to paste in a new layer.
- More selection to the area where we want to place the copied stone.
- Select Edit, select Transform, and select Flip Horizontal.
- Use lower opacity to place the stone.
- Place the layer mask on the stone.
- Invert the layer mask and brush the stone into place.
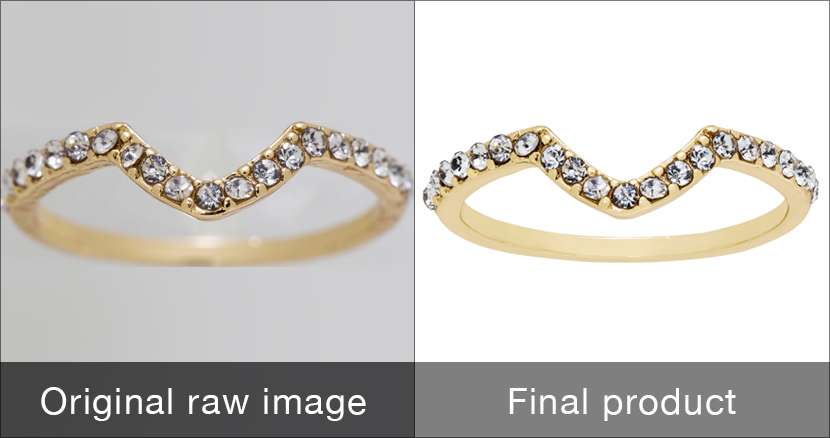
Jewelry product photography comes with its own set of difficulties. Knowing how to get around those difficulties make the photographs that much better. Although rings are difficult to photograph, fantastic images are possible to capture.
These simple image editing tips are easy to follow and will help you create photos that will wow your clients. White backgrounds are easy to shoot and produce phenomenal jewelry product photographs. Clients tend to prefer multiple angles to showcase the dimensions of the jewelry. Shooting and editing ring in photoshop can present challenges to someone unfamiliar with the process. Practice makes perfect and the more you go through the process, this simple process gets even easier.
Want even more of an advantage? Use Background Remove’s image editing services to reduce your editing and turnaround time.
Learn how to outsource image editing for ecommerce.